That one time we remodeled our kitchen
Ok, guys. Buckle up for this ride (there’s brick backsplash!). Mr. Darcy and I bought a house a few years ago and it was a fixer-upper. I saw amazing potential and it did not disappoint. I saw an early 2000’s style and I knew it would transform beautifully into a modern industial look beautifully.
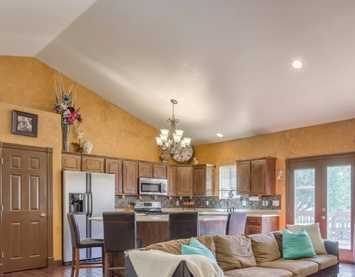
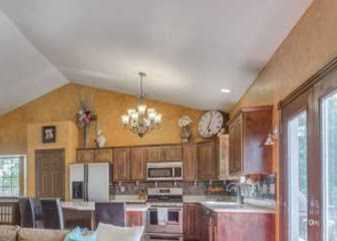
Here is what we started with:
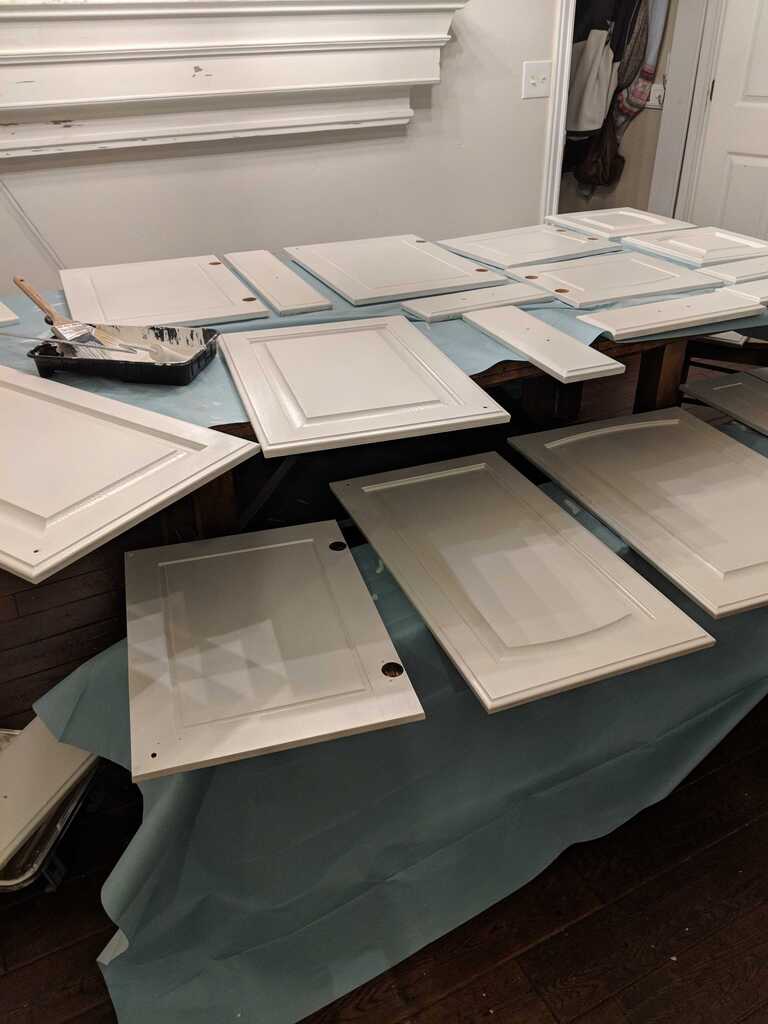
I won’t go into much detail about how I painted the cabinets. It was a very long and hard project to do by myself with five little kids (one was a tiny baby at the time) but my mom was staying with us when I did it, so that was a help! The dining room table was covered for two weeks with a painting tarp and lots of cabinet doors, so eating at the counter was a must for that time. Getting the paint smooth and without dust, dirt, painting brush hair, dried paint drips or brush marks was not easy but I was able to do it and it made me very proud!
The cabinets:
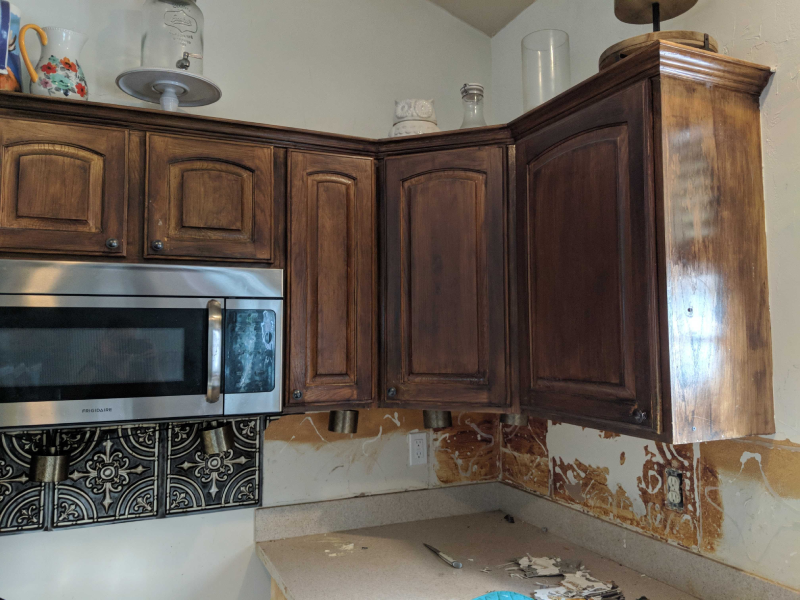
I removed all the cabinet doors and LABELED the doors and drawer faces so that I would know where to put them back and bagged the hardware. I cleaned the cabinets VERY WELL! The cabinets were really dirty and they had been stained by the previous owner. I didn’t strip them or sand them, which I know might shock some people. I really suggest that if you have a high shine on your cabinets you consider stripping with a chemical or sanding, which you can find more about online. I started by priming the dry and clean cabinets, doors, and drawer faces and I waited the recommended time to dry before painting. I used the Fresh Start primer by Benjamin Moore. I used Mountain Peak White by Benjamin Moore and I used the Advance in satin. It is a durable paint and it has levelers in it the help make the pain even out as it dries. I used only high-quality paintbrushes and rollers. It’s a must! It’s the only way to get a smooth finish! You don’t want hair in your paint and a smooth roller is needed so you don’t get streaks. Both are needed for the different parts of the cabinet. The grooves will need a brush the smooth, flat parts will need a roller. I did a total of three coats. I waited the recommended times in between coats, which is the hardest part, in my opinion. Depending on how you go about it, you may have a different setup than I did and it might be easier for you. I had each cabinet and drawer door on my dining room table (and some on benches) so I had to wait for each side to dry before starting a new coat. I recommend buying extra rollers and paintbrushes. I had to go to the store one too many times to get more!
Here is the brush I used: Wooster Brush
Here is the roller I used: Purdy rollers
My table while work was in progress:
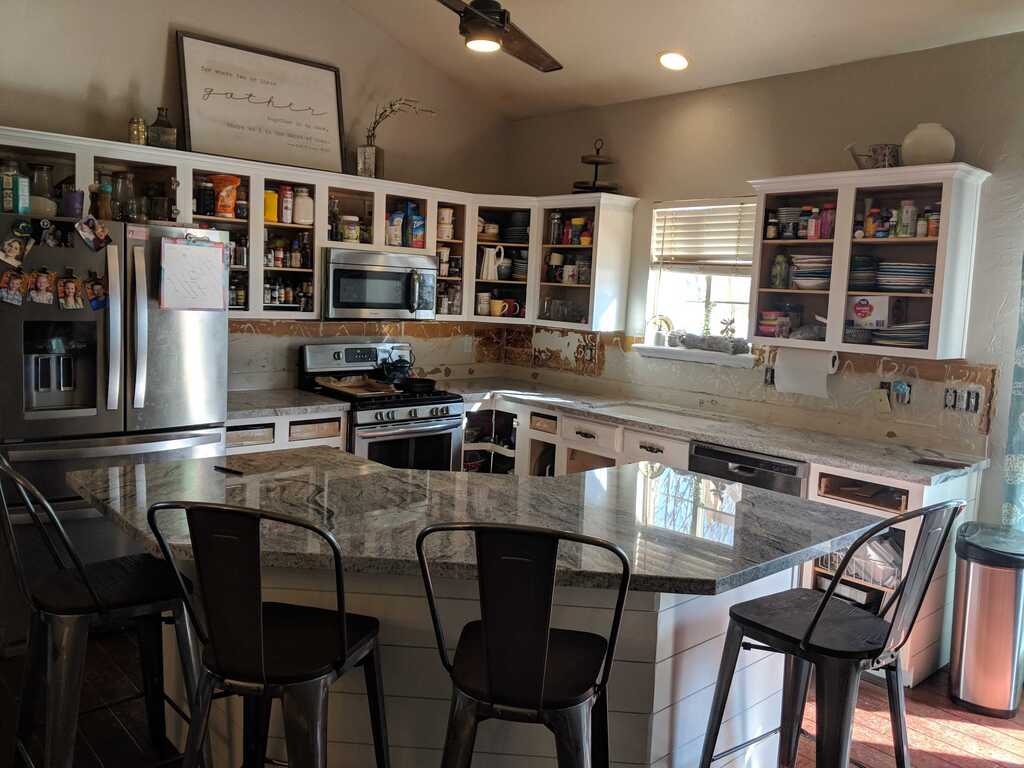
This is how the kitchen looked for a little while:
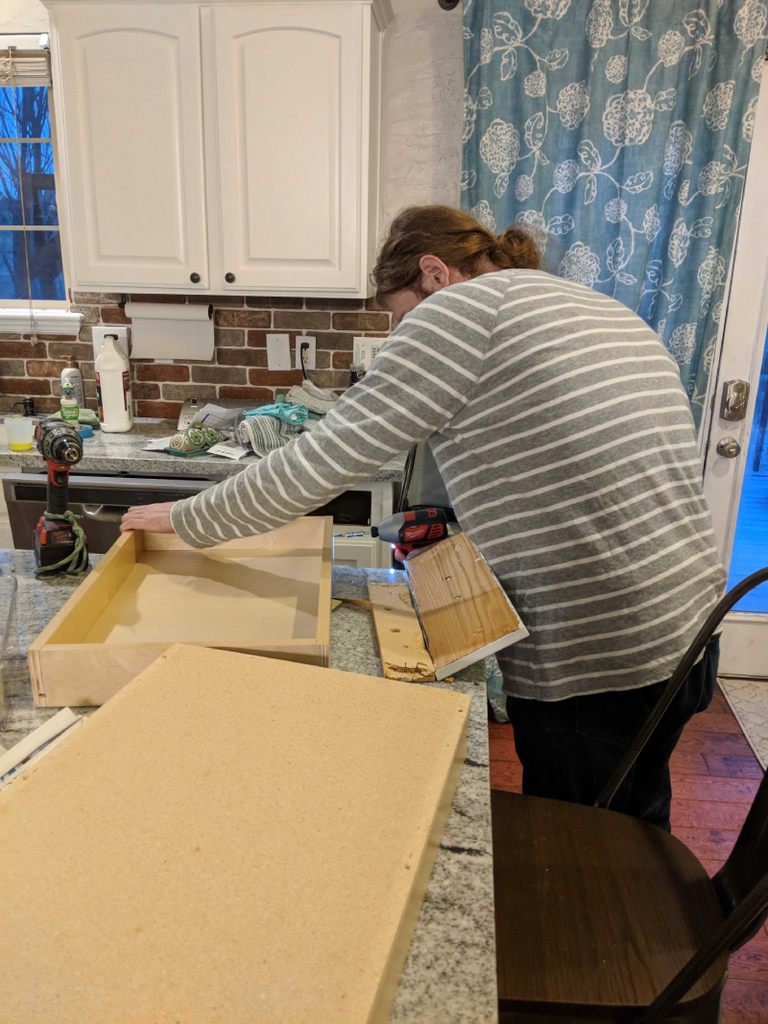
Here is Mr. Darcy putting together a new drawer we had to custom order. Some of the drawers were broken, and some of the cabinet hinges were also broken. I looked up the numbers on the hinges (because hinges can be different depending on the cabinet) and ordered new ones. I also had to wood putty some area where there was bad damage to the cabinets.
While painting was in progress, my favorite part of this remodel was yet to come. BRICK BACKSPLASH!
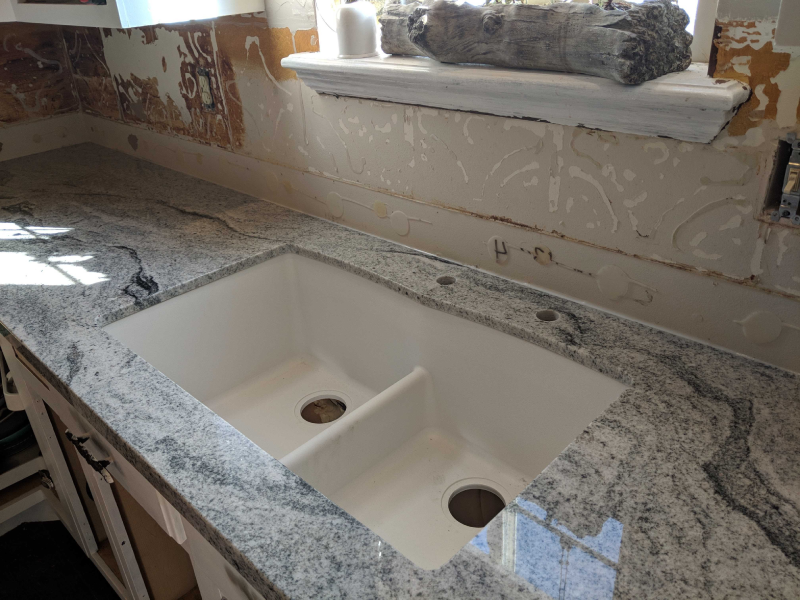
We replaced the counter before starting the backsplash because the backsplash is placed flush against the counter.
I ripped out the old backsplash, I made sure to scrape off all the glue to get the wall as smooth as possible. Thankfully, the wall was intact after scraping all the glue off. I was worried the glue wouldn’t come off or the drywall could have been damaged. Now for the fun part!
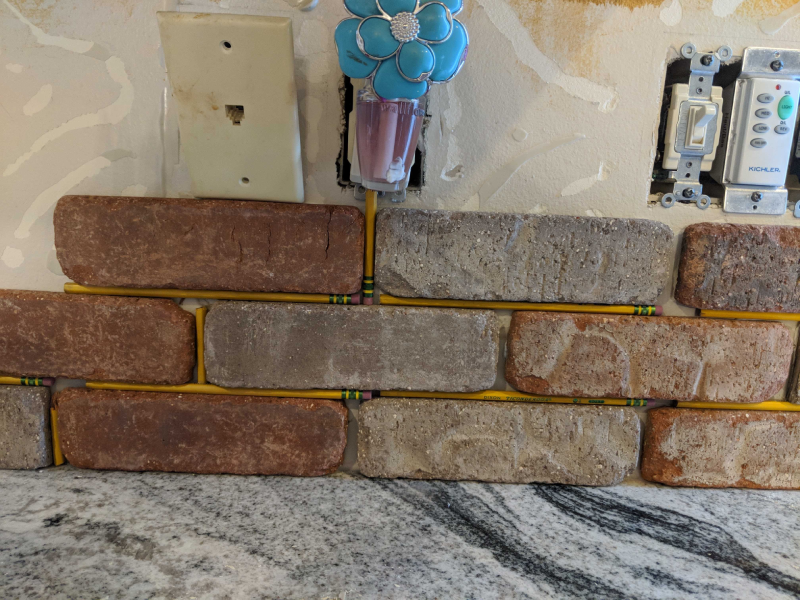
I used two different colors of bricks, alternating colors.
Here is are the bricks, here and here.
Mr. Darcy cut the bricks, I placed them. He used a diamond blade on his circular saw. He did a phenomenal job! We used this adhesive. I love the Loctite brand because it grabs quick. Make sure to use spacers, if you are wondering what to use, I used a box of pencils! haha. It was awesome. We didn’t do the whole thing at once and I was able to move the pencils around once the adhesive had dried enough.
Once all the tile was in place it was time to grout! I used a grout back, it’s like frosting a cake but it’s much harder to squeeze out the thick grout. I didn’t want to mix my own grout because I was worried about the mess of that. I bought pre-mixed sanded grout in white.
It was hard to make this video with one hand, two hands are better haha.
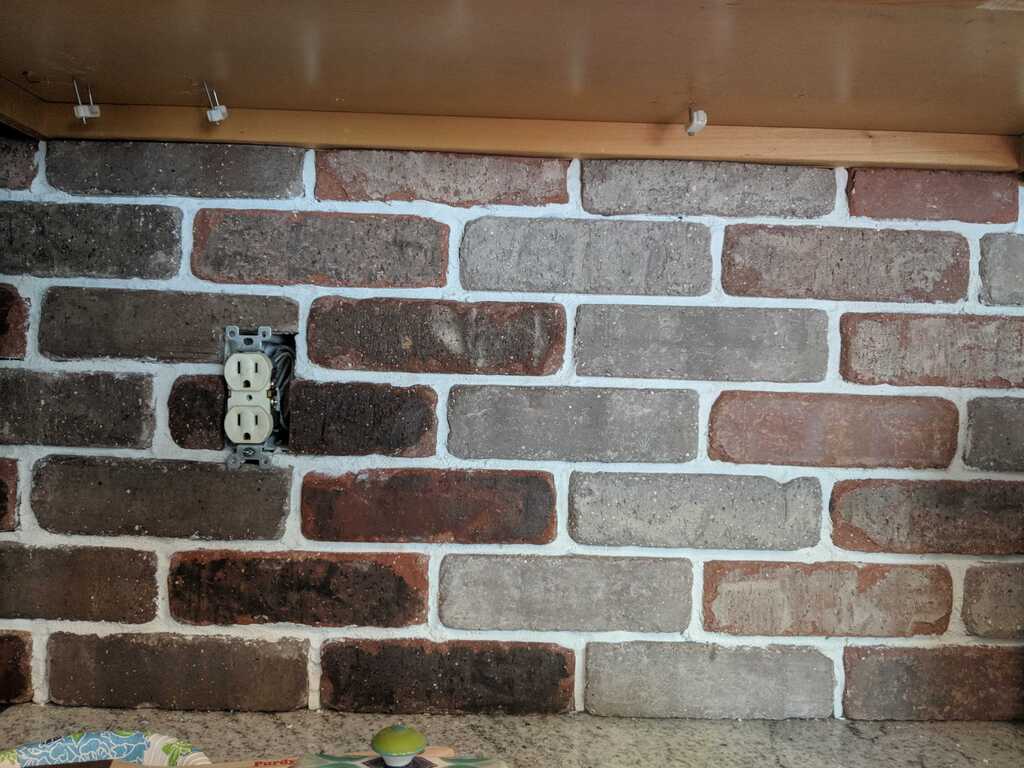
Something IMPORTANT to know is that brick should be sealed! Water, grease, food, it can all ruin this beautiful look. I did a lot of research on what to use to seal this type of backsplash that wouldn’t change the color of the brick. I was really worried about losing the weathered look. I couldn’t find anything online and I do my own experimenting. I found something! It is the same sealer I used for my counters. Find it at Walmart or somewhere local because it shouldn’t cost too much. I highly suggest you test a small area of your backsplash before doing the whole thing.
Before:

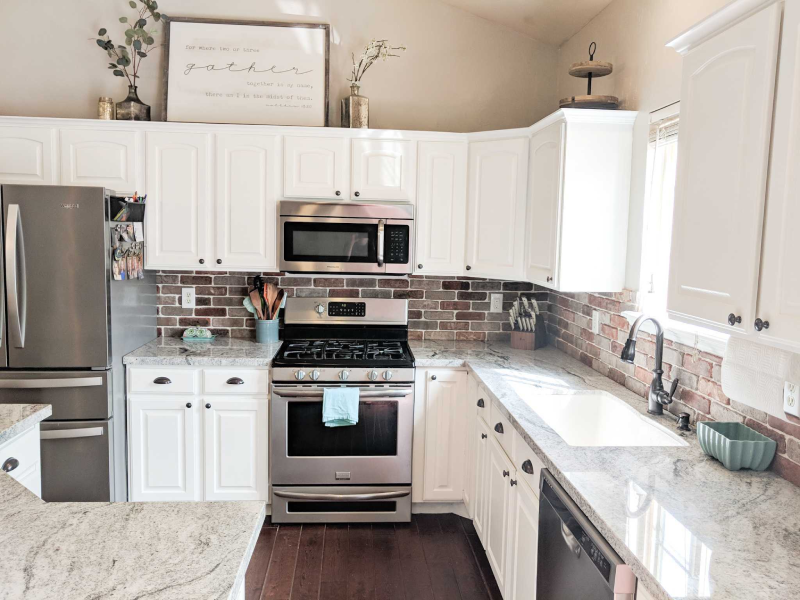
After:

Mr. Darcy added some shiplap to the island. I had to also paint the pantry door and trim white because at some point before we bought the house, it was painted brown. We replaced the light with a fan to give the kitchen some better circulation. The walls are Revere Pewter by Benjamin Moore.
One more before and after because it turned out beautiful! Such a wonderful change!
Before:
After:
If you decide to add some brick to your space, share it with me on instagram or facebook!